Monday, July 31, 2006

Anarchy is Occurring

Perhaps inspired by world events, knitting anarchy is occurring here. Me? Do what I'm told? Not so much.

Kerry Blue Shawl is coming along:
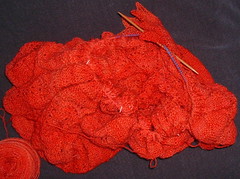
kerry blue heap

I know this looks more like a heap o' yarn, but trust me, the shawl is in there.

The pattern is nice to work, easy to follow, and I like the four-square construction: knitting from the center out, increasing every other round at the corners, makes a nice square. There is something disconcerting about the lace patterns in the shawl though, to me.

The first two patterns were linear, geometric, straight looking lace, and then we went into the classic shell pattern: not so linear, more curved and graceful. Somehow there was a visual disconnect to my eyes, the patterns seem randomly selected to fill the space, rather than connected to each other by some design concept. Perhaps just me, just ruminating, but there it is.

As the edge loomed, so to speak, I decided I would change a few things. First, I didn't like the look of the crocheted chain used to finish off the edge: I thought it would catch on anything and everything. So I was planning to just cast off the edge, loosely. Then I took a look at the lace design used to finish the shawl, a simple four-square grouping of holes, offset. I sort-of kind-of didn't like it, it just looked floppy and unfinished. The shawl needed a firm ending, like a period at the end of a sentence: a place where you know stopping is intentional.

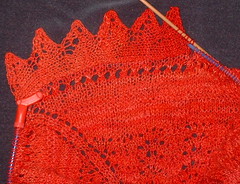
So I tossed the pattern, did a row of yarn over/knit two together, and then started a simple knitted on edge pattern:
kerry blue edging

This edging is from Joan Schrouder's handout, very easy and very few stitches (Joan! get a website!). I like it so far, better than the edging called for in the pattern. I'll knit a side and see how I think this works. I've been looking through books of edging patterns, and have a plethora from which to choose. I've also been imagining this four-square shawl construction in other lace patterns of my own choosing. This is where trouble starts.

This *following patterns* stuff? I'm learning a lot. There are tips and techniques in every pattern I've tried, adding to my skillset and causing much thought, which can be good sometimes.

Other times? Well, as you see, those thoughts may lead to knitting pattern anarchy.
Tuesday, July 25, 2006

Shawl Pins

It's hot here, I've been a slug. A little spinning in the mornings, then a lot of sitting in front of the cooler, sometimes knitting, sometimes dreaming of snow and ice. I hope by now everyone has seen An Inconvenient Truth. Frankly if this is the shape of things to come, I going to build a pool (hand me the shovel).

So, while knitting away, (on Kerry Blue shawl, in red, no pictures because just now it's a big red blob), I've been thinking of shawl pins. I like, and have used, the one I made for Fir Cone shawl (see this post), but this new shawl needs (interesting choice of word there) a new shawl pin (is the end result of all of this a pin for every shawl? yikes, oh, for the simple life: one shawl, one pin!). Anyway, thoughts turned to a spiral pin, and I began to plan.

I learned wire working from Celie Fago, in 1998. I would recommend her for any class ever, she's one of my idols. She teaches mostly polymer clay and PMC classes, which is reflected in her beautiful work.

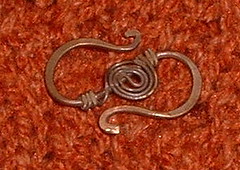
I digress. In that first class, we learned to make jewelry components and findings. One of them was this necklace clasp:

m-spiral

This is small, about an inch across, and was the inspiration for the first shawl pin. But the attached spiral, which Celie calls a Macedonian Spiral (I don't know why) is also a favorite of mine. What would this look like by itself, as a pin? Here is my rough sketch:

shawl pin idea

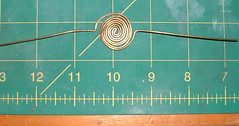
and here is the prototype in 18 ga. copper:

copper shawl pin

I planished the whole pin (hammered) over my bracelet mandrel (a curved piece of steel: my next jewelry teacher used a baseball bat instead), so it has a gentle curve, for the stick pin to slide through. I wanted to call it 3 Spirals, but the stick pin makes a 4th. So 4 Spiral shawl pin, it is.

Here is the process for making the pin. First, cut an 18" length of wire (this is 18 ga. red brass. I recommend 16 ga. but I had 18 ga. for the first two experiments). Fold the wire into two unequal parts:

shawl pin start

I folded at 10", so one part was 8" and one part was 10" long. Then start bending the spiral, with the short leg on the outside:

shawl pin 1st step

You will end up with a spiral with two ends sticking out opposite each other. Bend these into their own little spirals, planish and make the stick pin. After making the first few prototypes, I decided to make the ends a bit firmer, by making them into a wrapped loop, instead of spirals:

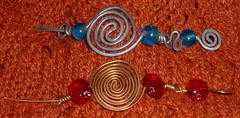
2 shawl pins2


I added beads, at Cathy and Birdsong's suggestion. These were also planished on the bracelet mandrel, one is 18 ga. red brass, and the other is 16 ga. galvanized steel.

Then I decided to see what inspiration I could find for other shawl pins. I googled shawl pin , and came up with a list and found several sites on the first page to search. Many had what looked like hair clasps: geometric shapes, held by a stick or pin. But Joan McGowan-Michaels website had these which looked more like beaded kilt pins.

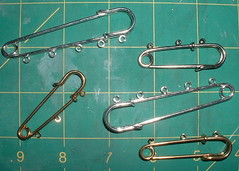
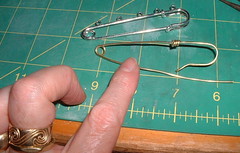
I have some pins like these on hand, from Fire Mountain Gems. They cost pennies (looks like it ranges from 25 cents to 40 cents a piece these days), and I'd bought a few packs for some other use long ago. Here they are:

kilt pins

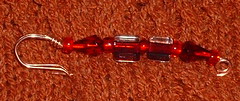
The obvious first step would be to just add beads to the loops provided:

kilt pin1

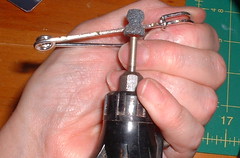
I also tried using wire to wrap beads on the pin, but the wire got too brittle to squeeze through the little loops, so I just cut them off. Then I had to file the sharp bits. I used a Dremel, with a bit that I use often for filing wire:

dremel bit

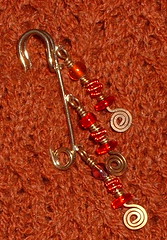
It's so well used, I have worn a wire size groove into it! Then it was simple to wrap some beads on the pin with finer gauge wire:

kilt pin2

I looked closely at the pin itself, and decided I could just make one, then slip the beads on the back of it, like Joan's examples.

The first step: cut a length of wire, this time 16 ga. bright brass, 13" long. I folded 4" down:

kilt pin process

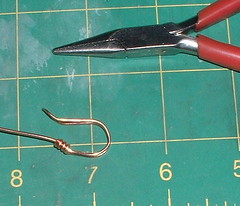
then wrapped and planished the folded end:

kilt pin process2

I bent 2" around a mandrel for the top of the pin:

kilt pin process3

(note the mandrel: a sharpie pen). Then I wrapped the other end:

kilt pin process 6

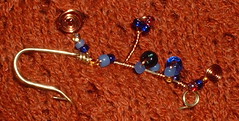
This still needs the pin part shortened, then planished and filed at the end. But wait: I forgot to slide the beads on the back (duh). Oops. So this one got beads wired on too:

shawl pin done

I made another, this time in 16 ga. copper, and made a smaller top (1 1/2" folded over, instead of 2"):

shawl pin process copper

This time I remembered to add the beads before making the spring turn:

shawl pin copper final

Wire working is simple, and requires very few tools: some pliers, a few mandrels (blocks of hardwood or steel plates) and some files. Any beginning class should get you enough skills to make all of these pins. If you are not interested in making them, lots of sites sell them: Joan's prices are very good, and there is as Etsy site with lots of cool wire and bead pins. Since I don't sell, I've given Yarngirl (Scotts Mountain Crafts Etsy shop) permission to reproduce these deigns for sale. If you have any questions, email me.

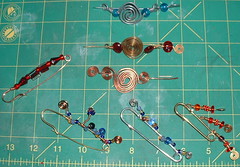
I made quite the collection in one day's experimenting:

shawl pin collection

Now I need to get busy and knit (stops to count) seven more shawls!

Friday, July 21, 2006

Consequences

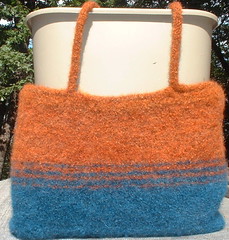
My sister had a birthday, while we were traveling. I needed to have a gift that I could easily pack and take along, and pull out on The Day. I also have plenty of handpsun yarn, and I've wanted to try felting some of it. A knitted, felted bag was the end result.

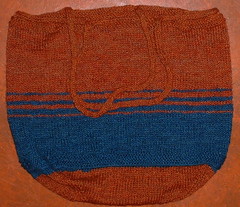
First I knitted the bag:

fekt bag3

I started at the bottom, with about an inch of garter stitch, number of stitches unknown (I just cast on, gasp). No pattern, just knit. Change colors when one color runs out. I knit around and around until I thought the bag was *deep enough*.
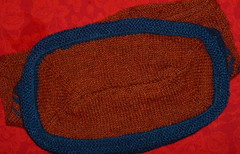
Then I picked up stitches on the garter stitch edge and knit the bottom of the bag:

felt bag bottom

I wanted a tote-bag/shopping bag for the farmer's market, something wider than deep, so the produce isn't piled on top of itself and smashing all that goodness. I decreased in four places, making a rectangle.

Then I added I-cord handles, this being the first time I have done attached I-cord (yes, I know, pathetic). The handles were 32" of I-cord, the rest of the top of the bag is reinforced with attached I-cord. The dimensions before felting were 46" around, 20" from the opening to the bottom.

Toss the whole thing in the washer.

We had (operative word) a top loader, and I could let it agitate, then check and reset several times until I thought it was felted enough. At last, I spun out the water, and set the bag up to dry:

felt bag dry

Nice drying rack eh? I had nothing *quite* the right size, but I used the trash can, upside down, and it worked just fine. The bag came out very nicely, perfect size, felted enough to feel sturdy, yadda, yadda, but I forgot to measure post-fulling. It's somewhat smaller than the pre-wash dimensions (duh).

The next morning we were to leave for Aspen, and my husband needed to wash just one more load for the trip.

Dead washer. I had killed it.

My husband was not anywhere near as annoyed as I would have been, in fact, he was almost gleeful. He'd been talking about replacing our old machine for several years, I just didn't see the point: sure it was noisy, but it worked. Why spend hundreds of dollars and add to the landfill, just because? Well, because he wanted a more energy efficient, quieter machine. Time passed. The machine obliged him and died.

We'd often had the discussion of top versus front loaders, and given the amount of time I use the washer for finishing handwoven fabrics, or just spinning water out of yarn or wool, I vetoed the front loader option. I need a washer I can stop mid-agitation, or mid-spin, and check progress.

My husband is a researcher. He gleefully jumped online and began to research just which machine we'd buy. I didn't care (beyond the top loader option) and so, much comparing began, gnashing of teeth, price shopping and deal-negotiating.

Finally we chose the local dealer (higher price, but better service and support-your-local-merchant cachet) and bought this machine.

Me? I'm just glad the thing arrived: yesterday. I'm off to wash a full week's worth of clothes and linens, plus my travel laundry. Who knew one could look so forward to doing the laundry??

Wednesday, July 19, 2006

Wrap Up

Quick pix, perhaps only of interest to me, but as an end to all the wedding preparations:

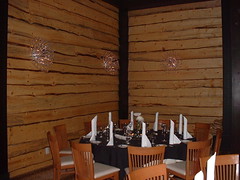
rehearsal setup6

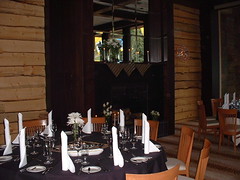
The Mountain Room at the Sky Hotel, Aspen, the rehearsal dinner site. You can see the rustic and contemporary blend in the decor. Here is the mantel:

rehearsal setup8

We had a last minute flower glitch: the flowers I ordered, and paid for, were *not available*. I wanted all spider mums, to work with the chrome wall sconces, but the supplier filled out the order with some other white flowers. It might actually look better than it would have with all mums, and, frankly, by Friday afternoon, I just wanted flowers.

The next day:

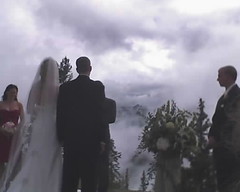
wedding11

My brother took this shot with his cell phone during the ceremony. You can see the swirling clouds, breaking occasionally for the mountain views at 11,000 feet. I haven't seen the photos from the wedding yet, and I'm sure the photographer was able to catch the fabulous setting. The really good news? We are all dry, the wedding site was dry, and a very comfortable temperature.

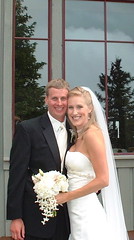
And here's the happy couple:

wedding9

Too much fun, too sweet, it was all a bit overwhelming, with lots of fond memories. I wish them a long and happy marriage.

Saturday, July 15, 2006

Penultimate Wedding Post

Yes, Claudia, there will be photos, no begging required! But I am still on the road, home soon, honest, and the camera will be downloaded. Today? Fallon, Nevada. Yesterday, Beaver, Utah (hush!).

The wedding: the weather was fabulous, perfect, and cooperated for the entire ceremony, reverting to fog, then rain once we were all inside, at the reception. Even the fog was mystical, magical, as the photos were taken and the mountains disappeared.

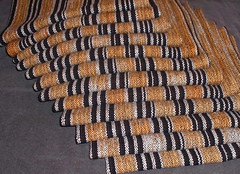
But first? The rehearsal dinner: it was held at the Mountain Room at the Sky Hotel, Aspen, as Judy so accurately guessed by the description of the room: rustic contemporary. I made the cotton/rayon cloth from this post, into napkins:

sky napkins

which were used as the centerpiece for each table. There was a charger on each, then stones, votives and a vase of flowers: pictures to follow once I am home to crop and download. The theme was elemental; earth, air, fire and water. It was subtle, enough to create an ambiance, and give me a focus for the planning. Pictures to follow, honest!

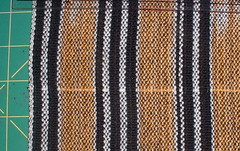
The fabric was easy to sew, even for me. I made mitered corners (ok, not so easy, some were better than others), but each square was perfectly true:

sky fabric pulled thread

It is easy to pull a thread, then make each cut along the grain. Handwoven fabric lends itself to this better than any commercial fabric: it's all in the scale of the threads.

So I pulled a thread, cut and sewed the four sides, making 20" squares. We used eight for the rehearsal dinner (of which now several are splotched with candle wax, so I am taking them back home, to wash). I will give all twelve of them to the new couple, perfect for casual patio dining. They have a fabulous stone patio, where I hope they will barbecue and entertain lots, having met (and danced with!) their wonderful friends.

Me? I've been to Ouray, Mesa Verde, Natural Bridges, Capitol Reef, Escalante, Bryce, Great Basin, and more, traveling home. Much fun at thrift shops, quasi-antique stores, and small town America, Western-style. But I'll be home soon. Mojo calls, poor cat: he has been sparring with a raccoon and I am anxious to ride into town and save him.

Saturday, July 08, 2006

And Now for the Fun Stuff

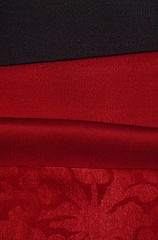
After the shawl and the vests were done, there was leftover silk fabric. That allowed me to make a few small gifts, starting with sachets for the bridesmaids. First we dyed the fabric:

sachet fabrics

This photo shows the black silk vest fabric as background, the silk fabric and two lining fabrics dyed red. The bridesmaids are wearing red/raspberry/cranberry, I'm not exactly sure what shade of red, so I chose this one, because it matched the ribbon I could find.

The sachets are sewn with a top layer of the handwoven silk, then two layers of lining: the plain lining inside, so the lavender flowers won't poke through, and the figured silk as the back. The figured silk was also the back of the white vest, and it is a particularly open weave, so it needed the lining:

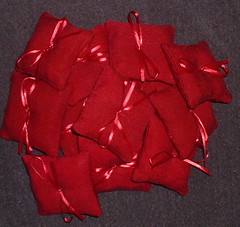
sachets

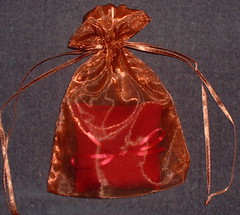
Here is the finished pile of sachets, all neatly tied up with a bow. They each got a little gift bag:

sachet bag

and they were on their way to the bride, to give to her attendants.

And the weather for the wedding day? Rain. Heh.

Monday, July 03, 2006

A Thing of Beauty

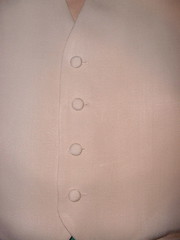
To some, a lowly buttonhole:

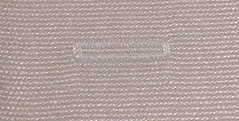
buttonhole

But to me a correctly placed, straight on grain buttonhole, whew! See that one thread, between the lines of stitches? They each did that, making it easy to see if the buttonholes were straight on grain (and yes, two were ripped, just to get them right).

Add to it:

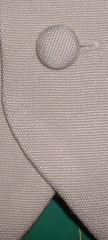
button

buttonholes

buttons, and you have a thing of beauty. Then do it again, in black:

buttons black

and you have two vests, ready for the Groom and Best Man, both of whom happen to be my sons:

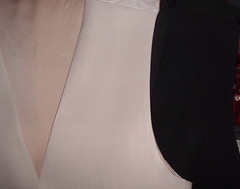
vests
(You have to trust me that the black hole in this photo is the black vest. Photographing black and white together? A challenge.)

Thoughts while sewing: I am so not a seamstress, much emphasis on that last syllable. The stress of it all, the sweating and procrastinating, sheesh, I'm glad it's all over.

I love the planning, dyeing, weaving, even the ironing (though I wish my mangle were out of storage for this pressing job), but the sewing up? Not so much.

The fabric: silk, again, the same fabric as the shawl, 30's/2 sett at 48. I love this fabric. I don't think there is a sett chart anywhere that will tell you to sett this silk this close. If you take a good look at the buttonhole picture at the top of this page: all you really see are the warp threads, the weft is virtually covered. This sett gives you fewer picks per inch, it is certainly not balanced, and that's what gives it the drape, unlike many plain weave setts. It is also easy to sew with: it is a firmer hand, and doesn't shift on the grain as much as a looser sett. The black fabric is simply a chunk of the same silk, tossed in a 2% dyebath of Lanaset black.

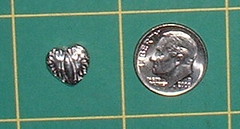
Finally, an oops! from the charm post here, I neglected to describe them. These are made from Precious Metal Clay:

charm dime grid

They have the initials of the bride and groom, and the wedding date stamped on the back. They are meant to go on the necklaces the bride is making for each attendant, they will hang at the back, by the clasp. The clay shrinks in the firing process, they were about the size of the dime before firing. (Thanks for asking Dee! What I am forgetting these days is legion).